Back at the end of 2013, I had a family member “go rogue” on thinking they could buy a tablet without assistance. After a lucrative trip to a store (for the salesman) they returned home with a (non returnable) Nook HD+; a locked down, custom Android 4 device which at the time had no access to Play store (it was added later).
The device quickly became useless, as the family member was not going to spend money on B&N book content. After a lot of very frustrating hours of pulling my hair out. I managed to get an early version of Cyanogen Mod running on it running from the ClockworkMod EMMC bootloader.
During the Christmas holidays in 2023, while helping said family member recover their Christmas decorations from storage, I came across the tablet and after a quick charge, it was still working – and still running Cyanogen. So I spent a few hours in between Christmas and New Year exploring whether there were any newer options for the Nook.
This article discusses modernising the operating system on the Nook HD+ in 2024.
First Blood
When I originally hacked Cynaogen Mod onto the Nook HD+ (aka “Ovation”), the frustrating process led to a series of late nights and… very little recollection of what I had done. Nearly a decade later, I’ve certainly forgotten everything that I did.
I distinctly remember that there were highly suspicious Windows drivers, ADB connections, MicroSD cards, replacing boot loaders, backups, crashes and a lot of trial and error.
I first tried to get into Recovery, however the only boot/button combination that I could find that did anything was the Power Button + Volume Up combination from an off-state. This presented an option to Factory Reset or exit. Some research revealed that the version of CWM that I had on the device was likely too old to be able to boot into Recovery. something that was fixed in later releases.
While I was fiddling pushing buttons, the Nook crashed and after refusing to start for a few minutes eventually rebooted… and reset itself back to the Stock Android 4 Barnes & Noble firmware, erasing CWM and Cyanogen.
Stock Android
As I was unintentionally back to stock, I decided to try it out, however I was unable to get past the Wireless connection screen with it connecting successfully but immediately presenting the error
“A network-related error occurred. You may have lost connectivity to the local wireless network. Press continue and we’ll try to test you connection”
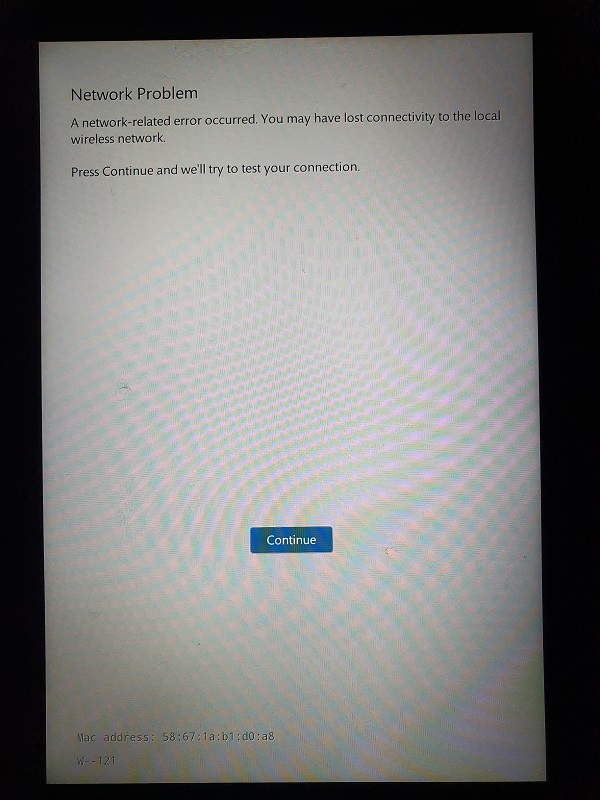
If you are having a similar issue and want to access the stock ROM. The error is being caused by the lack of TLS 1.2 support on the Android 4 ROM. To their credit, Barns & Noble have issued a formal fix for this which you can find here.
Having fixed this issue, I quickly gave up however as it wants you to create an account with Barnes & Noble in order to proceed. Pass.
Max All!
To keep this article short, I will save you the arduous amount of clicking around and researching that I did. Despite there being references to a LineageOS 17.1 (Android 10) build for the Nook HD+ (aka “Ovation”) on “tweakdroid”, I can find no evidence of this on XDA developers where all the work happens. So, I consider this SEO spam.
Part of the problem is also that it is now 2024. Most of the development work on this was suspended in the mid-2010’s, with the last major player, the venerable “secretwolf98” throwing in the towel in December 2019.
With that in mind, the best that I was able to find was:
- MicroSD Card Boot files: eMMC Clockwork Mod 3.1 dated 2014-01-19
[emmc-cwm-early3.1.img.gz] - Replacement Recovery: ClockworkMod (CWM) EMMC Recovery version 6 dated 2014-01-08
[cwm-recovery-ovation-6.zip] - More Advanced Recovery: TWRP 3.0.3-0 dated 2017-03-04
[twrp-3.0.3-0-ovation.zip]* - Operating System: LineageOS 14.1 (Android 7.1.2 ‘Nougat’) built 2019-11-30
[lineage-14.1-20191130-UNOFFICIAL-ovation.zip] - Google Apps/Google Play: Wicked Gapps dated 2018-01-02
[Wicked Gapps – Wicked witch.zip]**
* You may prefer to leave the recovery on ClockworkMod. I prefer TWRP as it is more feature enhanced and newer – plus I believe you may need TWRP in order to install the Wicked Gapps package successfully.
** The OpenGapps 7.1 pico installer would not work, citing insufficient space while “Wicked Gapps Nougat 7.1.x.zip” would install, but Google setup got stuck in a crash loop every time OOBE attempted to launch.
There are allegedly newer version of TWRP (up to 3.2.3.0) for “Ovation” by a user called “Amaces”, however none of his repositories are online any more and I could not find any other place to obtain them.
Getting the Nook HD+ to boot from Micro SD card
This is the hard part. I had two 16GB Micro SD cards and a 64GB one. Over 2 days of trying and rebooting the device until I was blue in the face, I could not get the Nook HD+ to boot from SD.
I knew that it should work as I had managed to get it to boot back in 2014 (after a lot of frustration). From my recollection, I had used ADB and had a bit of an Android debug driver hell and also using the 8GB micro SD card out of my production phone to get it to work. Unfortunately however, I did not have and 8GB card and I also no longer run Windows, so trying to use various Windows utilities and drivers was not an option (mainly out of laziness).
It should also be noted that from my experiments. None of the downloadable .img files that supposedly allow you to use “Win32DiskImager” or DD to write to the SD card work. They all write corrupt file systems, no matter what you do! So don’t waste you time with them.
So on the third day, I went back to basics. The following guide is what I did to get the Nook HD+ to boot from SD card – EVERY TIME.
A Bootable SD Card: The Process
Significant credit: This is largely based upon the work of digimax at this thread with a few tweaks.
I am using the Linux distribution popOS to do this. If you can, use a popOS or Ubuntu Live CD/bootable UFD yourself. If however you choose to use Windows, be aware of this: if Windows Explorer (of macOS finder) writes to the Micro SD card *before* you have written the boot file in place. It will not work. i.e. if Windows writes a recycle bin, if your antivirus scanner writes to it, if Windows benchmarks the UFD or if some silly system utility writes to it – game over, start again. Thus if you use Windows, I strongly suggest you do it all via CMD/diskpart and keep Windows Explorer CLOSED (and don’t forget to mark the partition as ‘Active’ in diskpart as apparently seems to be a common theme in the discourse over this).
- Turn off the Nook HD+, fully and charge the battery, fully.
NB: Fully off, not asleep! - Extract “emmc-cwm-early3.1.img” from “emmc-cwm-early3.1.img.gz” onto your Desktop (or anywhere, just NOT onto the SD card).
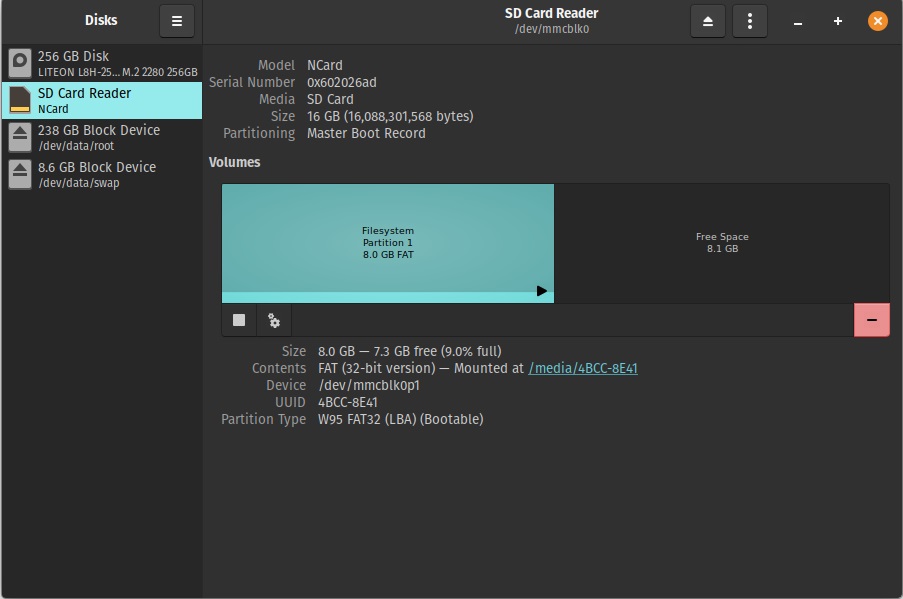
- Go into the application launcher on your Linux distribution and search for/find the System tool “Disks” aka “gnome-disk-utility” as shown below on popOS.
- Insert the Micro SD card into the Linux PC.
- On the devices list on the left select the SD Card (be very sure to select the SD card).
- Click on the “-” button and delete any and all partitions on the card until all you see is “Free Space” on the drive. The button can be red, white, on the left or on the right depending on what distribution you are using. So you may have to hunt for it (it is the red one above).
Note: This will erase all data on the SD card, irrecoverably. - Create a new partition in the free space using the “+” button. If your card is larger than 8GB, set the size to 8GB else, set the size to maximum. I suggest only using a maximum of 8GB as I could not get my 16GB cards to work with the full 16GB – your mileage may vary!
- When prompted, use the FAT file system option. Leave everything else as default and create the partition. I did not any any volume label either.
- It will take a few moments to create the partition (the UI may appear to freeze, just let it do its thing). Once it has finished single left click on the new 8GB partition, click on the cog / additional partition options button.
- Click ‘Edit partition…’.
- Ensure that the type is “W95 FAT32 (LBA) (0x0c)” and that the Bootable tick box IS TICKED. Click the change button to update the partition flags. As before, the utility may appear to crash for a few moments. Just let it do its thing.
- From the menu in the “Disks”/gnome-disk-utility click on ‘Attach Disk Image… (.iso, .img)’.
- Browse to your Desktop and select the emmc-cwm-early3.1.img file.
- Open the file browser/explorer. You will now find a “900 MB Volume” mounted in the drives list. Go into this volume and leave the window open.
- Open a second file browser/explorer. Carefully click to open the new “8.0 GB Volume”.
Note: Do not accidentally write anything to this window, if you do, go back, delete the partition and start again from step 6. - You will now have two windows side-by-side, the 900 MB and the 8.0 GB ones. Drag the files from the 900 MB volume over to the 8.0 GB volume – IN THE FOLLOWING ORDER. ONE AT A TIME. Ensuring that each has fully copied before moving to the next file. If you get it wrong, go back, delete the partition from the SD card as per step 6 and start again:
- MLO
- u-boot.bin
- uImage
- kernel
- ramdisk.cwm
- Only once these five files have finished copying over, copy any other files you require over to the Micro SD card i.e.
- cwm-recovery-ovation-6.zip
- twrp-3.0.3-0-ovation.zip
- lineage-14.1-20191130-UNOFFICIAL-ovation.zip
- Wicked Gapps – Wicked witch.zip
- You can copy these in any order or all at once. Plus if you want to add any other mods or files, now is a good time to copy them over too.
- In the Linux file browser / gnome-disk-utility eject the 900MB volume and the 8.0 GB volume.
- Eject the Micro SD card from the PC and insert it into the still powered off Nook.
NB: You can leave the port cover open it has no bearing on the boot process. - Press the power button on the Nook (and no other buttons). After a few moments, the device should boot to CWM.
Installing the new Recovery & LineageOS
Now that you have a bootable SD card, you can erase and upgrade the Nook.
Tip: In CWM, the volume up/down buttons are the up/down controls. The “U” home button is the enter button and a single press of the power button is the back button.
Note: If you wish to perform a backup of the device, now is the final opportunity to do so using the options in CWM. After this step, you will erase the device.
- In CWM, select to perform a “Wipe data & factory reset” of the device.
- Once complete go to install from ZIP and select to install from “external_sd”
- Select the “cwm-recovery-ovation-6.zip” file if you want to use CWM or the “twrp-3.0.3-0-ovation.zip” file if you want to use TWRP and perform the installation.
I recommend using TWRP for later OS compatibility, CWM for older ROM’s.
NB: If you have problems, install CWM first, reboot and repeat the process to install TWRP. - Once complete, use the back button (power button) to return to to the home screen and then power off the device (always say no to rooting it, unless you want to root it).
- Once off, eject the Micro SD card.
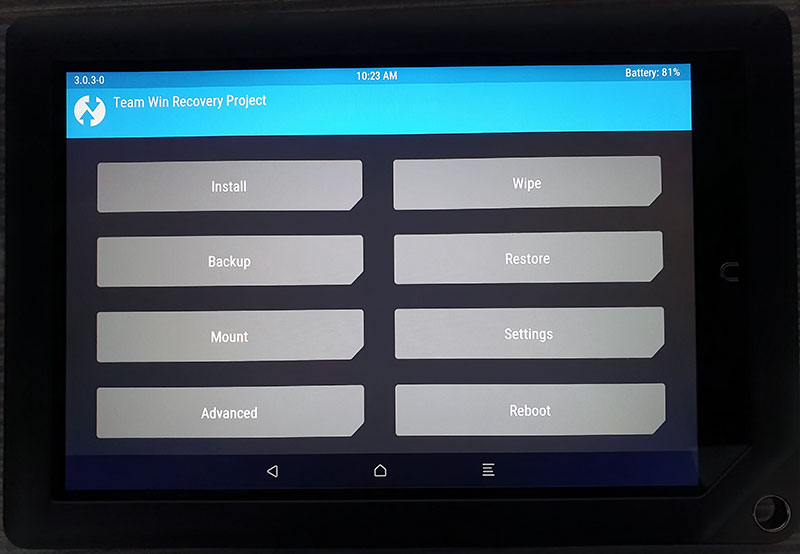
- Hold down the “U” home button and power the device back on again – keeping the “U” button pressed down. If absolutely nothing happens and it hangs on the Nook boot screen, power down and repeat until successful. It may take a few tries. You will be successful once CWM/TWRP boots from the device rather than the SD card. TWRP is shown below.
- Insert the SD card.
- Head to the Storage / mount option and mount the “external_sd”/micro SD.
- Hit the back button, and now head to install from zip/install once again.
- Select “lineage-14.1-20191130-UNOFFICIAL-ovation.zip” on the external_sd/SD card.
- Without rebooting, immediately install the second zip, “Wicked Gapps – Wicked witch.zip”
- If you want to install anything else, such as a Root mod and the Low RAM enabler (“android_lowram_enabler_0vermind_edit.zip”), do so now.
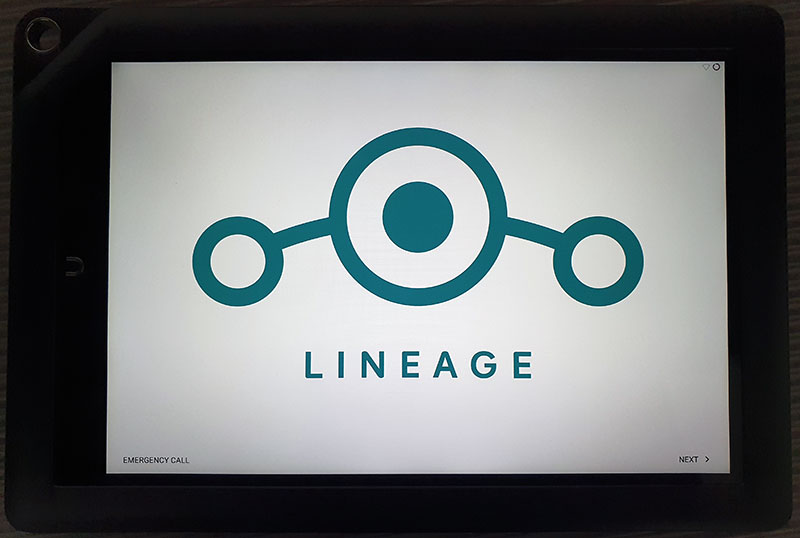
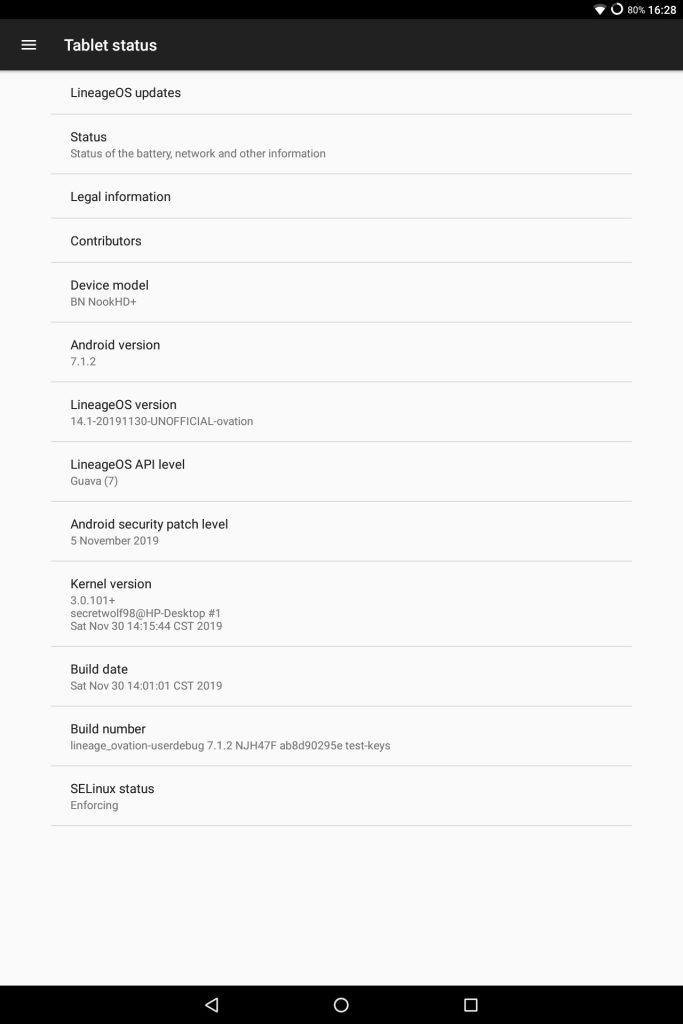
- Reboot from the Recovery one last time and this time allow the operating system to boot. The first boot will be very slow and may appear to hang at the CWM screen, but eventually you should get the LineageOS boot animation and after a couple of minutes it will boot to the OOBE as shown below.
That is it, you should now have the most up-to-date version of Android that (as of writing) I was able to find for the Hook HD+ (“Ovation”). This build has an Android security patch level of 5th November 2019 – not amazing at the beginning of 2024, but significantly better than if you were still running Android 4!
The Verdict?
In playing with it, I have found the device to be stable, but given its age and the operating system bump involved here, it is slow. The problems that I have observed are fairly minor, but include:
Google Play was not working after OOBE: The version in the Wicked Gapps .zip file was very out of date. It will take a little while for Play to self-update – and given the slow speed of the device, this will take longer than you expect. Give the device a few minutes after first trying to open the Play Store before trying again. That said, it does fix itself on its own and the Play Services error notification that I received went away once it had updated correctly.
App Support: Android 7.1.2 is very old at this point and newer apps will not run on it, including the current breed of Chromium browsers such as Brave or Chrome. Firefox does still however work and is not horrendously slow either (thanks Mozilla!).
Landscape Rotation: While the device boot firmware works in Portrait, the custom ROM boot process switches to landscape and as such the logon screen will always appear in landscape. In order to swipe up to unlock the lock screen, in landscape mode, you have to flick it upwards very quickly, otherwise it will ignore you.
According to this thread and a post by “leapinlar”, this was a choice be custom ROM dev’s back in 2013 for the “Ovation” device. I find it incredibly annoying (and it was not doing it on the previous custom ROM that I had on it!). you can enable rotation on the lock screen in the Display settings however, it will still default to landscape.
It might also be worth nothing that there are other users reporting wireless disconnect issues after long idle periods and some users reporting intermittent video playback issues in the official ROM thread on XDA Dev’s. I have not spotted either of these issues as of writing. If I do, I will update the post.
Do you know of any newer versions?
If you are aware of any newer versions of CWM, TWRP or LineageOS/ASOP for the Nook HD+ “Ovation”, please let people know in this thread over on XDA Dev’s.
Happy modding!