OEM:Strings is a utility that does one thing, and one thing only. It lets you look at the system identification strings burned in to your BIOS/UEFI.
The OEM:Strings redistributable is intended to solve a ‘chicken or the egg’ dilemma encountered by imaging and packaging maintainers, SCCM admins and MDT administrators.
The Problem
In order to create a driver profile for a new piece of hardware, you need to know what the Manufacturer and System Model Number strings are from the BIOS. In order to find out these strings, you need to go through the process of installing Windows and opening System Information so that you can setup your imaging environment correctly and re-install Windows.
OEM:Strings solves the problem by providing a Windows Deployment Services (WDS) PXE, CD/DVD or USB bootable environment in which you can discover this information without first installing Windows.
Once you have installed OEM:Strings on your WDS Server, or created bootable media. You will be able to quickly gather this information without ever having to go through Windows OOBE, or clean install Windows again.
What Does it Show?
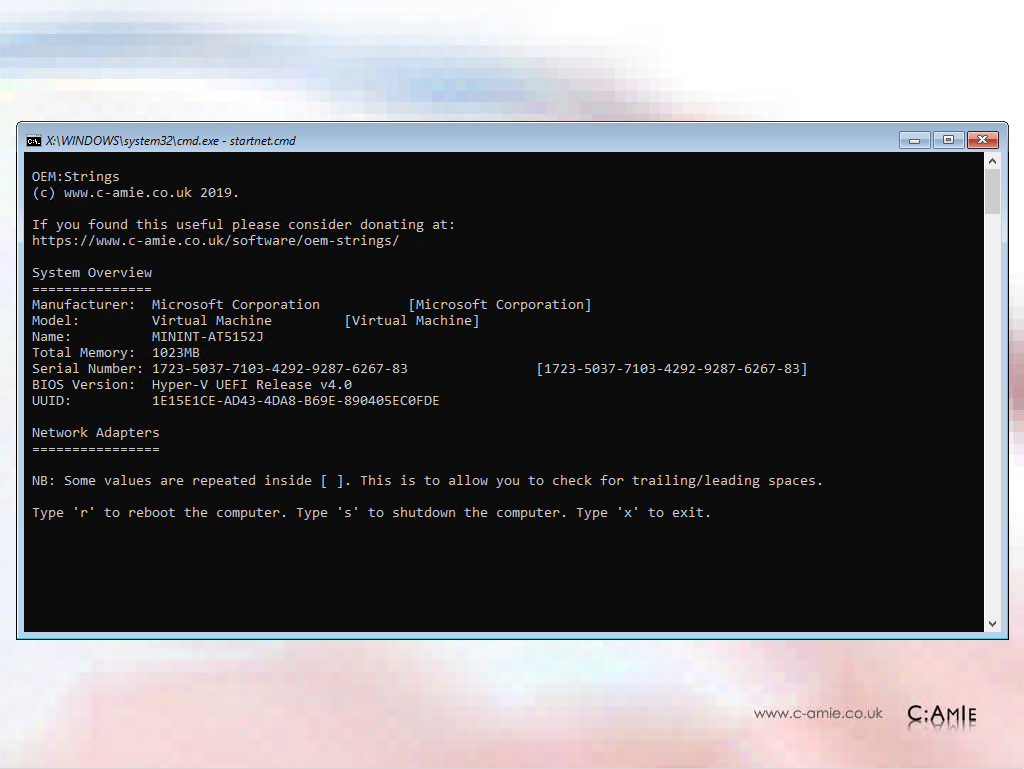
The following information is displayed in OEM:Strings:
- Manufacturer Name String
- Model Name String
- Network Hostname
- Total Memory
- System Serial Number
- BIOS Version
- BIOS UUID/GUID
- Network Adapter Manufacturer, Identity String and MAC Address*
* Network Adapter identification requires the presence of a suitable driver within the image.
The only other things that OEM:Strings does is shutdown or reboot your PC.
Download
You can download OEM:Strings from the links below.
| CD/DVD | USB Flash Drive (UDF) | Windows Deployment Services (WDS) |
BIOS (213 MB) |
BIOS (213 MB) |
BIOS (204 MB) |
UEFI (278 MB) |
UEFI (278 MB) |
UEFI (270 MB) |
If you found OEM:Strings useful in your environment, please consider donating through PayPal to support the bandwidth costs.
Deploying OEM:Strings
The following quick-start guides outline how to start using OEM:Strings.
CD/DVD
- Download the binary package
- Extract the ISO from the compressed download to a folder on your computer
- Use a burning tool (e.g. InfraRecorder) to burn the ISO to a blank disc.
- Insert the disc into the computer and boot from the CD/DVD
USB Flash Drive (UFD)
- Download the binary package
- Extract the ISO from the compressed download to a folder on your computer
- Download Rufus
- Insert your preferred UFD into your computer (all data on this flash drive will be erased)
- Open Rufus
- Select your preferred UFD as the target
- Select the ISO file as the source
- Click Start
- It will take 1-2 minutes to complete the copy. Once complete, exit Rufus. Safely eject the UFD
- Insert the pen drive into your computer and boot from the UFD
Windows Deployment Services (WDS)
- Download the binary package
- Extract the WIM from the compressed download to a folder on your WDS server
- Open the Windows Deployment Services MMC snap-in (the admin console)
- Expand ‘Servers’, ‘<your server name>’ and click on ‘Boot Images’
- Right click on ‘Boot Images’, select ‘Add Boot Image…’
- Browse to and select the location of the extracted WIM file
- Click next through the wizard until it is complete
- Reboot your target computer and execute a Network / PXE boot
- Follow the instructions on the screen
- If prompted, select “OEM:Strings 1.0.0 (<architecture>)” from the boot list, where architecture is either x86 or amd64
Adding Network Adapter Drivers to the WIM
If you wish to add additional network drivers to the WIM, please use the following BAT/CMD script example to inject Windows 10 compatible INF driver files into the image from a Windows 10 1803+ or Windows Server 2019+ system.
It assumes that your OEM-Strings_1.0.0_Boot_amd64.wim file is located on the root of C:\ and your driver INF files can be located in a folder at C:\Drivers
mkdir C:\Mount

:: Mount the image
Dism.exe /Mount-Wim /WimFile:"C:\OEM-Strings_1.0.0_Boot_amd64.wim" /Index:1 /MountDir:C:\Mount

:: Scan for Driver INF files
Dism.exe /Image:C:\Mount /Add-Driver /Driver:"C:\Drivers" /Recurse

::Dismount the image
Dism.exe /Unmount-Wim /MountDir:C:\Mount /Commit

rmdir C:\Mount /q