This document outlines the steps required to install Windows NT 3.51 Server or Workstation under Microsoft Virtual PC 2004 SP1.
Prerequisites:
- Windows NT 3.51 Server / Workstation
This guide assumes that the installation source is an original NT 3.51 Gold (RTM) source and does not include any Service Pack revisions. If the source is slipstreamed with a Service Pack some steps outlined in this document may not be required. - The guide assumes that you are installing 3.51 into a new Virtual Machine, and not as a dual boot.
- Windows NT 3.51 SP5 – Available from the Microsoft FTP Server (12.7MB).
Installation:
Windows NT 3.51 can be installed from either a CD, or from the local filing system using the WinNT Setup sub system. For the benefit of readers in this article, the primary focus will be on performing the installation using WinNT Setup rather than a CD.
Prepare the Virtual Machine using the New Virtual Machine Wizard
- Create a new Virtual Machine
- Set the Operating System as Windows NT Server
- Select a custom RAM level and set it no higher than 64MB of RAM. It is important that the RAM allocation does not exceed 64MB during the Install process, however it can be increased after installation.
- Create a new Virtual Hard disk, with a minimum size of 400MB. Leaving the setup defaults as a dynamically expanding volume is recommended.
Installing from the CD/Floppy Disk Set
If you intend to install from a CD ROM you will require the NT 3.51 Setup boot floppies. I have created Virtual Floppy Images of the disks for use with Microsoft Virtual PC which you can download below.
Download: NT 3.51 Virtual PC Boot Disks (1.5MB)
- Boot onto the first two floppy images
- Press Enter to install Windows NT 3.51
- Select C to perform a custom installation
- Boot from the third floppy image
- Ensure that setup has detected the CD Drive as:
IDE CD-ROM (ATAPI 1.2) / Dual-channel PCI IDE - Press Enter to continue
- When prompted either select “To install Windows NT from CD-ROM, press ENTER” if you are installing from the CD or “To install Windows NT from 3.5″ disks (drive A:), press A.” if you are using a floppy disk installation set.
- Setup your Installation options, ensuring that 3.51 is setup as a “Standard PC“. Perform the setup using the VGA or Compatible display adapter
- At the partition manager setup the physical volume onto which you wish to install Windows NT. You cannot create a drive volume using the default NTFS driver up to the 8GB limit. It is recommended that you create a volume of 4096MB (4GB) to install the operating system onto.
- It is recommended that you format the partition as NTFS
- Select the Windows Folder for the Install and press enter
- Insert your Windows NT 3.51 CD and begin the file copy process. Once complete setup will reboot into GUI mode setup
Installing using WinNT.exe
If you are having problems with the CD based setup, or you wish to perform the installation using a local system file copy, you must use the 16-bit WinNT setup command line routine.
You will need a MS-DOS startup disk containing FDisk, Format and SmartDrive (recommended) and a mathod of transfering the i386 folder of the Windows NT 3.51 Setup CD onto a Virtual Hard drive
- Boot onto the MS-DOS boot disk
- Run FDisk
- Create a new Primary Partition up to the maximum allocation ont he virtual hard disk
- Create a new Extended partition on the same drive of a minimum of 300MB
- Create a new Logical volume within the extended partition of the maximum size
- Exit FDisk and reboot back on to the MS-DOS boot disk
- Format C: as a FAT16 disk partition (The size can only be up to 2GB)
- Format D: as FAT16
- You must now copy the i386 folder of the Windows NT 3.51 Setup CD onto the D: partition. You can do this by mounting the VHD as a secondary drive in another Virtual Machine (e.g. Windows 95, Windows XP) and copying the files over -or- by using a Boot disk with CD ROM support and manually copying the files into a sub folder on d: (as the number of files in the NT 3.51 setup folder is upwards of 1,800 files you must copy them into a sub folder. FAT16 has a file limit of 512 unique file objects on the root folder)
- Boot back onto the MS-DOS boot disk
- Load SmartDrive (Recommended)
- Open (‘CD’) the folder on D: where you copied your setup files. For the purpose of the remaineder of this guide D:\i386\
- Type:
winnt.exe /s:D:\i386 /x /b - The setup file copy process will begin
- Once the file copy has completed your will be prmoted to reboot your computer. Dismount any VFD images you are running and remove all floppy disk from your drive.
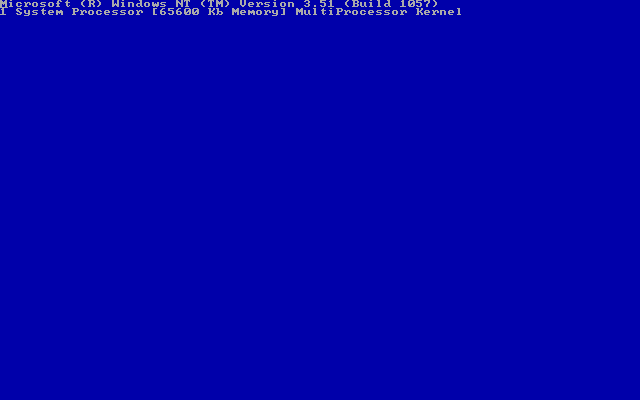
- NT 3.51 will begin booting. This first bootup will take longer than normal boot processes
- If at this point the system runs into the STOP error:
KMODE_EXCEPTION_NOT_HANDLED Address 801adcac has base at 80100000 – ntoskrnl.exe
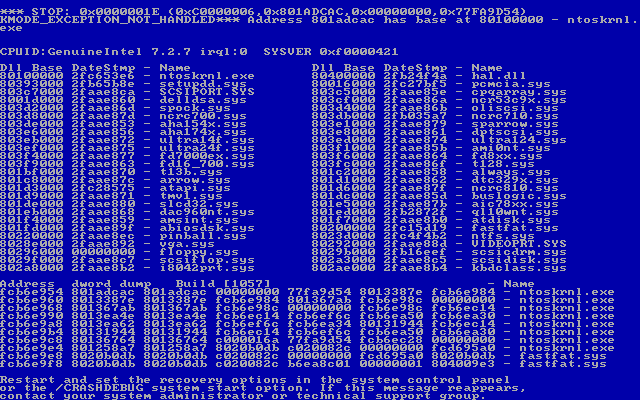
- The error message is caused because of two reasons
- Firstly because setup has incorrectly determined that the Virtual PC system is not a general IBM compatible x86 PC. In order to continue with the installation you must force the WinNT Setup application to run as a IBM Compatible PC.
- Additionally, setup may halt at this point if you are using more than one VHD (Virtual Hard Disk) file to access your NT 3.51 setup/installation drives. In order to proceed you must close the Virtual PC and disable the second Hard Disk.
- Reboot the system
- Immediately after this screen:
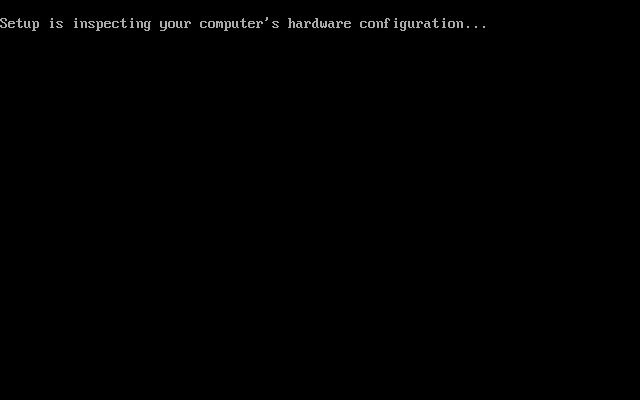
- Begin pressing F5 twice a second
NB: No dialogue prompt will be displayed to the user offering F5 as an option, so do not wait until you see the blue screen - If you were fast enough you will be presented with this screen;
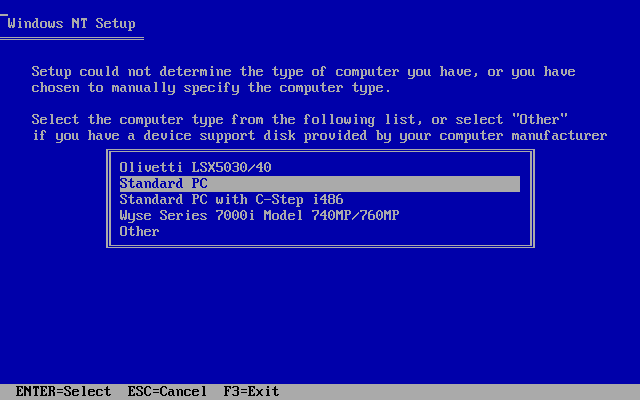
- Select Standard PC
- Press Enter to install Windows NT 3.51
- Select C to perform a custom installation
- Ensure that setup has detected the CD Drive as:
IDE CD-ROM (ATAPI 1.2) / Dual-channel PCI IDE - Press Enter to continue
- Setup your Installation options, ensuring that 3.51 is setup as a “Standard PC“. Perform the setup using the VGA or Compatible display adapter
- At the partition manager setup the physical volume onto which you wish to install Windows NT.
You must not attempt to delete the C:\ volume of the hard disk, otherwise setup will fail completely. If you wish to add additional drives at this point you can do so.
If you wish to resize the partition in the future, use disk utilities such as PowerQuest Partition Magic after you have applied SP5. - It is recommended that you specify to convert the partition to NTFS
- Select the Windows Folder for the Install and press enter
- Windows NT 3.51 will reboot the setup program and boot onto the Windows NT subsystem GUI mode setup at this point in the installation

Before attempting to make use of NT 3.51 it is strongly recommedned that you install Service Pack 5 so as to benefit from update which will considerably stabalise the Kernel under Virtual PC.
Additional Installation Tasks
Windows NT 3.51 Driver Installation
Windows NT 3.51 Workstation Patching & Installation Guide (maintained by me)